What Creates a Challenge With Night Photography?
Night photography, especially as a beginner, can present both the opportunity to create compelling images, besides as some of the most difficult technical challenges you might face. Fortunately, these challenges are all learning opportunities to better your skills behind the camera. In this night photography tutorial, nosotros'll look at how to photograph some common subjects afterward dark with ease.
The idea of night photography can cover a wide range of subjects, including everything from landscapes and cityscapes shot just later on dusk to highly technical astrophotography opportunities similar nebulae and meteor showers, and even artistic subjects like light painting. For this guide, I'll focus on the essentials for shooting images when it gets dark, covering the best camera settings for dark photography (besides equally the "why" behind setting them), identifying some of the most accessible subjects and compositions to start with, and concluding with the some tips specifically for post-processing night images.
Tabular array of Contents
What is Night Photography?
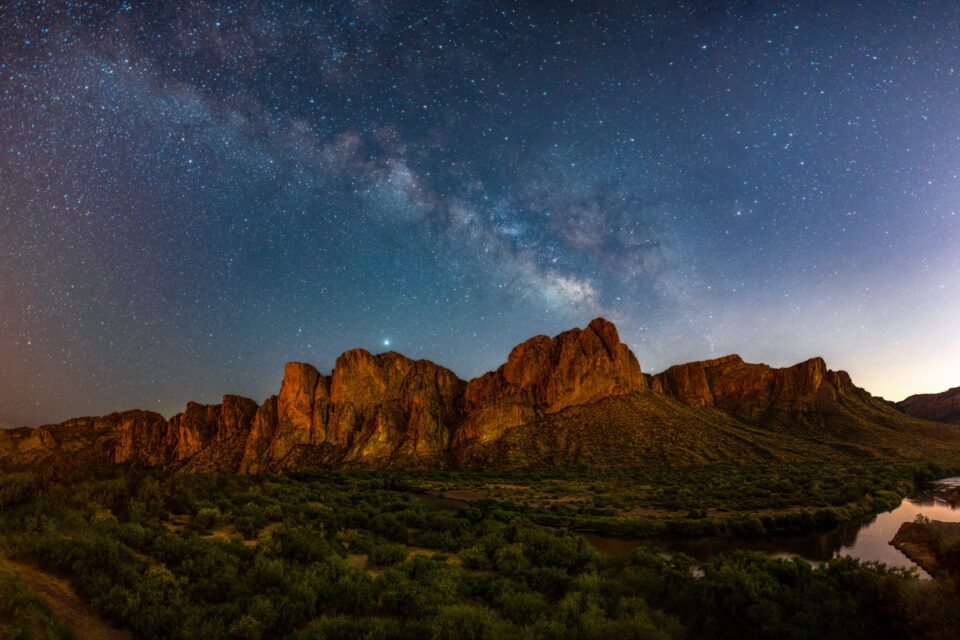
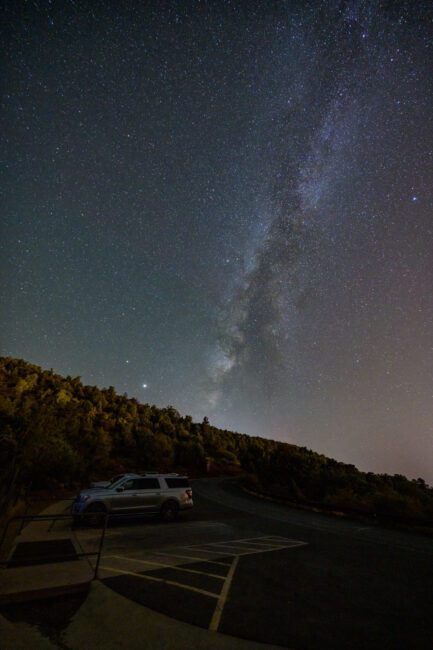
While any prototype taken after sunset could fit the concept of night photography, I particularly associate night photos with a few specific categories of subjects. For me, the classic nighttime photo is a shot of the Milky Style galaxy stretching over a unique foreground – this photo typifies many of the challenges that brand night photography exciting.
Pulling off a shot similar that is fabricated easier by having the right gear, understanding how to set up your camera and exposure for the best results, and making a few smart decisions when editing. Fortunately, these same skills transfer to merely nearly any subject you want to photograph at night, whether it'due south a streetlight-lit portrait, an architectural photo, or something entirely different.
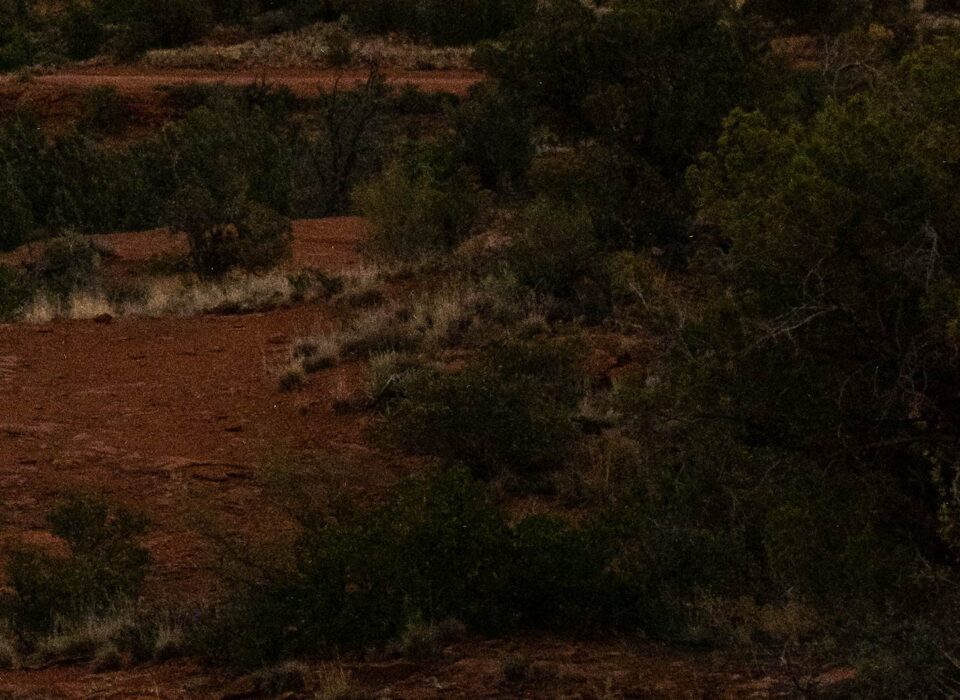
These skills all transfer because the biggest challenge in night photography is the lack of light. Calorie-free is essential to photography, and not having plenty light can make a lot of the automated systems in your camera less consequent. Y'all might find that your autofocus has a tougher time locking on, your camera's meter doesn't deliver the advisable exposure for the scene, or your final photo looks grainy and speckled, thanks to noise from using a loftier ISO setting. All of these challenges are solvable, withal. In the next section, we'll accept a wait at the few pieces of gear essential to a successful night shoot, followed by building an agreement of how the shutter speed, aperture, and ISO can be best set for whatever night scene.
What Gear Practice I Need for Night Photography?
You can create amazing nighttime photos with whatsoever camera. Thank you to recent advancements in features like Night Mode on iPhone and similar features on Android phones, camera phones are also capable of taking nifty night images. Whatever your pick of camera, however, you'll probably want some fashion of steadying your shot. While information technology is possible to shoot nighttime images handheld, and for many subjects at night, this'll work fine, a tripod can unlock an fifty-fifty wider range of subjects and possibilities.
Tripod
Determining what tripod is all-time for yous tin can depend profoundly on both what your discipline is and what type of camera and lens you're using. We've got an entire, in-depth guide to selecting the best tripod for your photographic camera that you should check out if y'all're looking for more than information. As a beginner, I went with an affordable tripod from Manfrotto. If I were in that position today, I'd consider the Manfrotto Element MII. This version features an Arca-Swiss-compatible ball head, a padded bag, and user-friendly twist leg locks, all at a reasonable, sub-$150 price betoken.
If you've got a larger budget or heavier gear, you lot can consider stepping up to carbon fiber tripod legs and a fancier tripod head. This tin increase the stability and effective load capacity of your tripod, just can get expensive fast.
On the other end of the spectrum, if yous're shooting with a compact photographic camera, phone, or pocket-sized interchangeable lens camera, you tin employ an fifty-fifty smaller tripod, like the Joby Gorillapod. This unique concept functions similar both a regular tripod and a flexible mount, capable of wrapping around a railing or tree branch for unique angles.
Remote Trigger
Avoiding shaking the camera is key to getting sharp photos during long exposures, which are oft the exposures you lot'll need for night photography. A tripod can eliminate a lot of vibration, but finding an alternate way to trigger your camera is fundamental to getting every last detail sharp. Fortunately, in that location's a lot of options for triggering your shutter without shaking your camera, and many of them are free!
The first selection is but to utilize the delay built into your camera. On many models, you lot can set up a cocky-timer or shutter delay. This means that when you press the shutter, a short timer starts, catastrophe with the camera'due south shutter triggering. In that intervening time, the vibrations of you lot pressing the button have time to settle out. An interval like 2 seconds should be plenty for nearly situations. For data on how to prepare this, only cheque your camera's manual for the phrase "self timer".
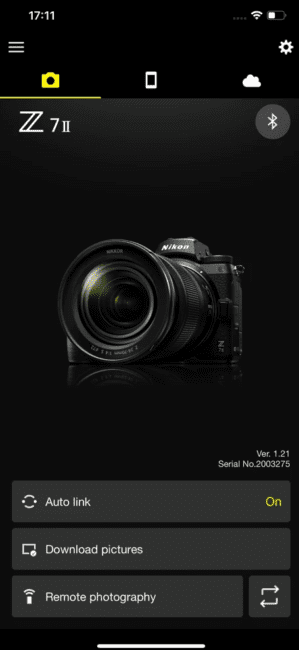
For some cameras, particularly newer models, there's frequently an app that you can utilise. Catechism's is chosen Camera Connect, Nikon's is called SnapBridge, and Sony's is called PlayMemories. Each of these offers the ability to remotely control many of their contempo cameras, along with a host of other features.
If yous've got an older model, or just prefer a hardware solution, consider ownership a remote for your photographic camera. Remotes from third political party manufacturers are often very inexpensive, and they work great for just triggering the shutter. B&H offers a wide range of remote shutter releases. But make certain to cheque that it's compatible with your detail camera model, as each brand often has a diversity of remote standards.
On smartphones, y'all tin choose betwixt an app that allows self-timing, triggering with an alternate device like a smartwatch, or even using the book clicker on headphones as a shutter release.
Photographic camera Settings
Once you've got your equipment squared abroad, it'due south time to think nearly what settings volition work for your scene. Depending on your subject, you might non be able to rely on your photographic camera's metering or autofocus, so understanding how and why to ready these manually is of import.
Shutter Speed
For night photography, I similar to start with shutter speed. Depending on the subject field and how you've stabilized your camera (handheld or tripod-mounted, for instance), you'll want to set up different shutter speeds. A longer shutter speed will need better stabilization, like a tripod.
To understand what counts equally a longer shutter speed, it'south helpful to know this dominion of thumb: a shutter speed slower than 1 over the focal length of your lens, similar i/20th of a second with a 20mm lens, increases the risk of blur. Of course, this can change with steadier hands or image stabilization/ vibration reduction systems, but the rule tin can provide a skillful reference point. In one case yous start to get into multi-second long exposures, you'll definitely need to mountain your photographic camera to a tripod, or rest it deeply on a surface like a table.
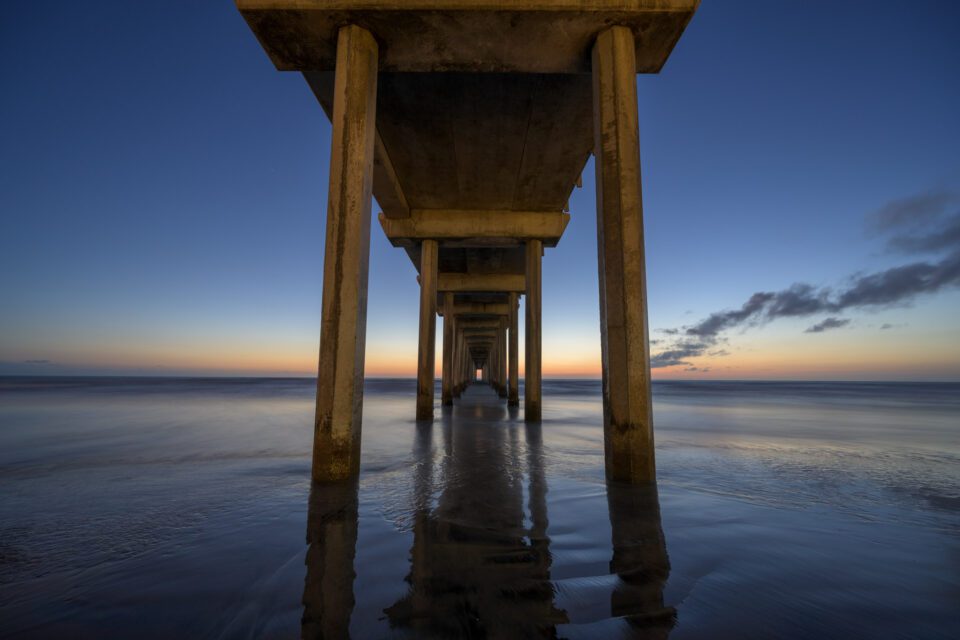
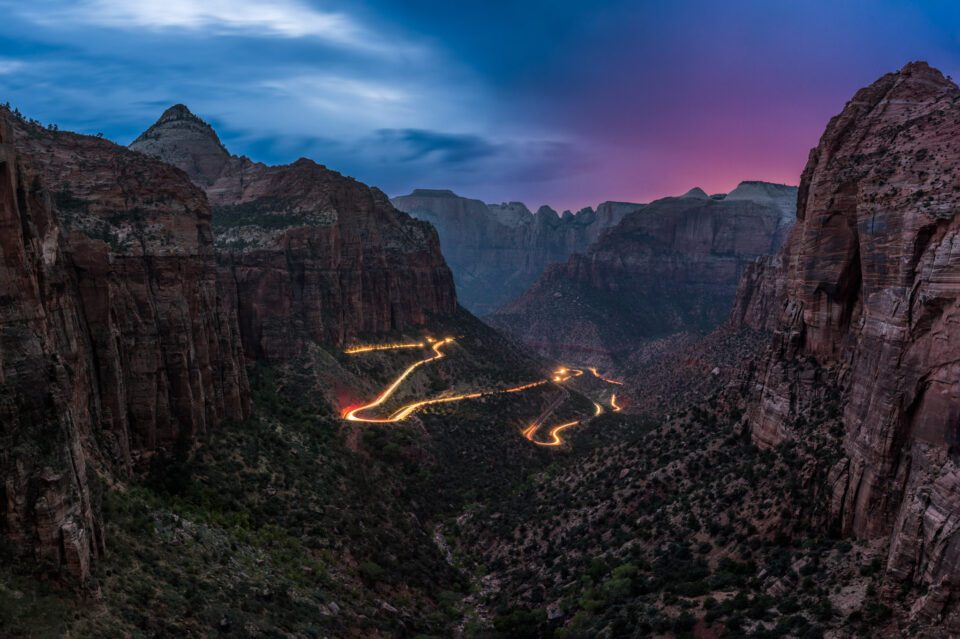
These multi-second long exposures aren't without their benefits, however. Along with capturing much more lite (great in nighttime situations), they also open up a broad range of artistic possibilities. With longer exposures, you tin can get interesting furnishings like low-cal trails from passing cars, moving water tin smoothen into puffy clouds, or y'all tin can even "paint" light into the scene using a flashlight. As your exposure gets longer, you can also subtract your ISO or cease downwards your aperture because you have more light to work with, decreasing the noise in the shot or increasing the depth of field .
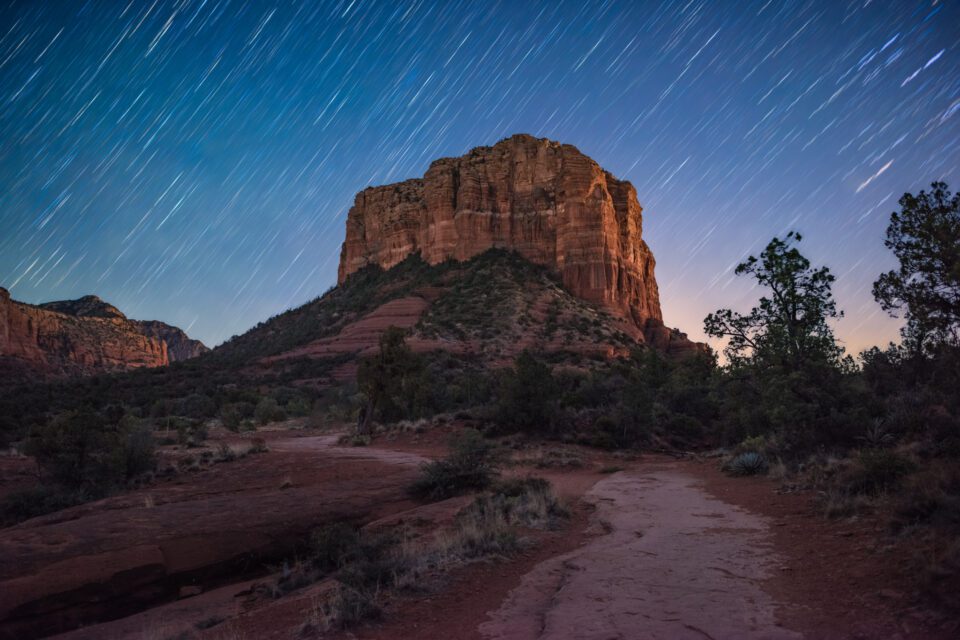
If you take stars in your scene, there is one final consideration for shutter speed, and information technology's caused by the apparent move of the stars themselves. Put merely, the stars move across the heaven at night, and with longer exposures, you can get streaks behind the stars from that movement. Nosotros've got a guide on how to deliberately create that star trail effect here, merely if yous're instead looking to proceed your stars pin-point abrupt, in that location's another petty rule of pollex that can help. The "500/focal length" rule, where you carve up 500 by your focal length in millimeters, yields the longest exposure you should use to retain sharp stars. While this shutter speed might be a fleck too long for loftier resolution cameras or large prints, it's another good starting point for understanding your possible shutter speeds. (In that location is too a more complex alternate dominion called the NPF Rule; nosotros compared the 500 Dominion vs the NPF Rule hither.)
If you want to set a shutter speed longer than xxx seconds, you lot might bump into a limit on your camera. Many cameras cap the longest shutter speed that tin be gear up at 30 seconds. Fortunately, almost of these cameras as well offer Bulb mode, where the shutter remains open as long every bit the shutter is held down. If yous're planning on using seedling mode, make sure to pick up a trigger – many advanced triggers offer the ability to fix far longer exposures, or trigger repeatedly, acting every bit an intervalometer. If you're interested in an advanced trigger, the Vello Shutterboss II is available in versions for many pop cameras, and includes all those features and more.
To recap, if you're shooting handheld, you'll need a brusque enough shutter speed to prevent blur. Once y'all get on a tripod or stable surface, you lot're merely limited by subject move, like star trails, or your ability to gear up the shutter speed. You'll desire to keep those factors in mind when you're choosing your ISO and aperture, which nosotros'll discuss in the post-obit sections.
ISO
While shorter or longer shutter speeds tin offering both creative options and existent-globe considerations, ISO choices are a chip simpler. Broadly speaking, a higher ISO volition result in more dissonance in your epitome, but it tin can let yous use a shorter shutter speed for the same level of brightness in your paradigm. Some cameras, particularly those with larger sensors and newer designs, can offer "cleaner" results with less noise at higher ISOs, but all the same, using the everyman native ISO setting (and getting a bright enough epitome by manipulating shutter speed, aperture, and the ambient light instead) yields the all-time image quality.
With that in mind, you lot'll want to set the everyman ISO that will enable a proper exposure based on your choice of shutter speed and aperture. If you want to take a portrait in depression light, and need a 1/30th of a 2d exposure, don't exist afraid to fix an ISO like 3200 or 6400. On the other hand, if yous're shooting a moonlit landscape and tin choose betwixt 5 seconds at ISO 6400, or 20 seconds at ISO 1600, the lower ISO exposure volition have less racket.
One more thing to remember about ISO is that it's easy to change. If you lot're trying to compose in low calorie-free, or are using Alive View and need a brighter image, y'all can chop-chop increase your ISO to 6400 or higher, and apply that brighter preview, while still existence able to decrease your ISO for the terminal shot.
The concepts around ISO, digital racket, and sensors can go very complex. We've got articles that dig into the technical details of noise and ISO invariance, if you'd like to larn more.
Aperture
The aperture of your lens, typically denoted by the f-stop, like f/three.v, determines how much light comes through your lens. An f-finish that lets more calorie-free in is counterintuitively indicated by a smaller number. A lens set up at f/ii.viii lets through more light than when the lens is set up to f/9.

For night photography, at that place are two primal considerations when choosing your aperture: the amount of light let through, and the depth of field. Stopping down your lens (AKA choosing a narrower discontinuity similar f/8) lets through less light, but it increases the depth of field in your image. You can stop downwards to ensure that your entire landscape is sharp from front to back, or to deliberately capture less light to allow for a long exposure to capture things like star trails or light trails. On the other manus, y'all tin open your discontinuity to f/2.8 or f/one.8, if your lens supports information technology, to make information technology easier to shoot in very nighttime environments, like when photographing the Galaxy.
Ane last thing to know nigh your choice of aperture is how it impacts paradigm quality. Nigh lenses perform better when stopped down some amount. A lens that can shoot at f/2.eight will often exist sharper at a moderately narrow aperture similar f/v.half-dozen. This is another situation like ISO, where you have to balance prototype quality against the other considerations of your composition. Especially for night photography, you lot may need to lose a scrap of sharpness or depth of field in commutation for capturing as much light as possible with a wide aperture.
What Night Photography Subjects Are There?
At that place is a huge variety of dark photography subjects. Some of my favorites include cityscapes, notable for their vibrant color and dynamic presence, and landscapes, where fifty-fifty common scenes tin take on a new dazzler under moonlight. Yous can besides cull to get more than creative with techniques like calorie-free painting, or more than technical, with subjects like astrophotography.
Landscapes and Cityscapes
Photographing landscapes and cityscapes at dark tin exist a great style to find new cloth in a scene you're already familiar with. Fortunately, it'due south piece of cake to get started with these subjects, equally yous can take your time and experiment with settings.
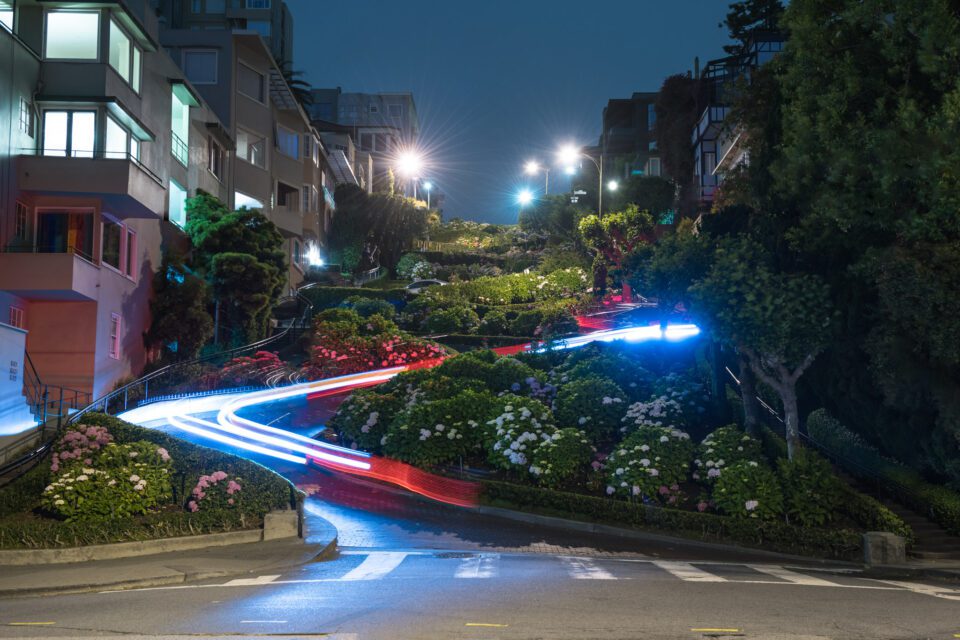
When composing an image at night, consider the impact of motility and light. Roads can offer the opportunity for light trails, while the full general hurry of a city can make for a bang-up contrast with the static buildings. The direction of the moonlight tin also make a big difference, likewise as the phase of the moon – a full moon that'south low on the horizon tin light the scene quite dramatically, while a new moon provides the best opportunity to photograph stars or falling star showers.
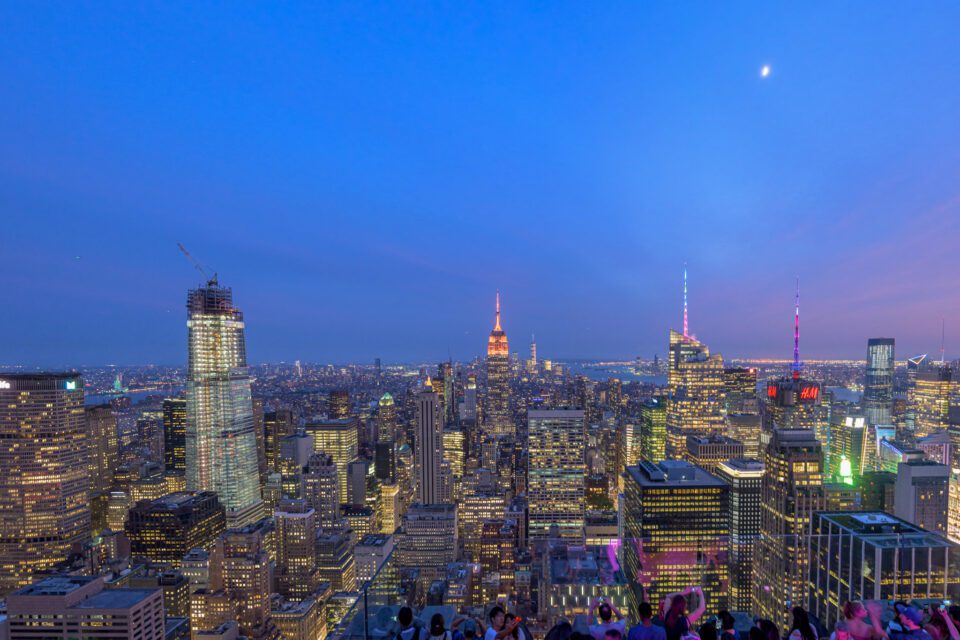
Time of nighttime can also take a huge effect on the wait of the epitome. Y'all may take heard of the "bluish hour" before. This thirty-ish minute menstruum after sunset tin can still leave enough light in the heaven to create a really pleasant blueish color. As more than time passes, this colour will fade from the sky, and that opens up the opportunity to photo the stars and focus on artificial light sources in the scene.
Astrophotography
While deep-sky astrophotography tin can become very complex (just check out some of the setups in our deep-heaven astrophotography guide), photographing the Milky way can be a great way to get started with this niche. The Milky way, the milky way that our solar system is located in, is a classic astrophotography bailiwick and appears as a vivid band of stars and interstellar dust.
The first thing to keep in mind when trying to photograph the Milky way is that it's non a static object in the sky. Depending on your location and time of twelvemonth, it can expect drastically different in the sky, transitioning betwixt an arch low on the horizon, through a vertical column.
For location-specific information, I like to employ the app PhotoPills, which provides a wealth of useful night photography tools. I particularly like PhotoPill'south augmented reality view of the Milky way – this view overlays a live preview of where the galaxy will appear at whatever indicate in time, correct over your phone's camera view. This preview makes it so easy to plan shots for future dates, especially if you're not familiar with concepts like azimuth and elevation.
Beyond planning for the appearance of the Galaxy itself, you'll want to consider the significant bear upon of the moon. A full moon can drown out the appearance of the galaxy for sure, but fifty-fifty a quarter moon may present difficulty, as the galaxy will appear less prominent in the brighter sky.
Every bit a beginner, the wider and faster your lens is, the ameliorate your results will be. Unfortunately, these lenses can be pretty expensive to buy, but might make a neat option for a rental. If y'all've identified a composition you're excited about, renting a Sigma 14mm f/1.8 volition nigh guarantee practiced lens functioning. The Rokinon 14mm is a much more upkeep-friendly pick, although it'll require manual focus and may have more than image quality issues.
Whatever your selection of lens, make sure y'all're shooting every bit wide as you can in both focal length and discontinuity for Milky Way photography. This'll increase the amount of time you can go out your shutter open before getting visible star trails, and it's the best way to capture the faint galaxy against the night sky.
For the camera body, amend low-light performance is always welcome, but about mod bodies can shoot clean plenty results at ISO 3200 to brand them viable. Whatsoever your choice of body, exist prepared to transmission focus. For focusing in such low light, I like to use a magnified Live View of a distant bespeak of light, with a target like a particularly bright star, the moon, or metropolis lights on the horizon. Once you've set that transmission focus point, be careful not to bump it, and don't forget to cheque for variation every bit the night goes on. Tack-abrupt stars can brand or break most Milky way photos.
Milky Way camera settings are pretty uncomplicated, but they may require a little tinkering depending on your camera and location. With a wide angle lens, a good starting point is to open your aperture equally wide as possible, fix your ISO to 3200, and prepare your shutter speed to 20 seconds. From here, you may need to conform the settings to match your surroundings, but probably not by also much in whatsoever direction.
As you're iterating shots, you can attempt turning on your camera's Long Exposure Racket Reduction. This setting works past taking a second exposure after your first, and using that info to remove hot pixels (pixels in your image that announced as bright dots, ofttimes from heat). This process is helpful, but not necessary when just working on your settings and composition, and it comes with the downside of finer doubling every exposure's time. After you get your shot set up, you can turn this setting off to shoot more chop-chop or on to get slightly college image quality.
Artistic Subjects
Shooting at night also presents the opportunity to create your own subjects. One of my favorite ways to do this is with light painting. The core concept is simple: in a dark surface area, while your photographic camera'southward shutter is open, you add light into the scene for an creative effect. While there are dedicated tools for this, I got started with light painting with just a flashlight and some colored gels. These gels let me create a multifariousness of colors from a white flashlight, but now at that place's even a range of very affordable RGB LED lights bachelor.
When light painting, you're but express by your creativity. Yous tin combine low-cal painting with cityscapes, portraits, product photos, or even make the light painting the subject itself. Only remember that you'll have to write backwards if you're aiming towards the photographic camera – good luck channeling your inner Da Vinci!
Post-Processing Dark Images
Editing nighttime photos doesn't have to be significantly different from editing your other photos. All the sliders still piece of work the same, and yet principles employ. There are 2 sliders that are more important for dark photography than daylight photography, even so: the White Balance/Color Temperature setting and the noise reduction setting.
White balance can have a major impact on the feel of a dark photograph. A libation color temperature will bring beyond the common cold, blue feel of night, and is the archetype option. In mixed lighting environments, like a cityscape, there may not exist a single "correct" color temperature. Instead, y'all'll take to prioritize by subject or experience. Lastly, for Galaxy photos, a slightly warmer color temperature might work meliorate, equally going too cool can drown out the delicate looking structures and dissimilarity that actually make the milky way stand out.
Noise reduction is a affair of personal gustatory modality. I observe that colour racket is both more noticeable and more than confusing to the image than luminance noise, so I focus on reducing color dissonance when possible. Luminance racket is that grainy texture visible in high ISO shots, and reducing it basically involves applying a very slight blur to the prototype. With the luminance noise reduction slider, avoid using besides much, as it'll make your image expect unpleasantly soft.
Color racket reduction is a fiddling easier. Color noise is visible as specs of "wrong" color in areas, or even color in colorless areas, similar cherry dots in the nighttime sky. It's easier to remove than luminance noise without negatively impacting the prototype, although going too far tin can still remove some low-level colour details and saturation. For colour noise, I recommend that you just bump the color noise slider upwards until your image looks skilful at 100%.
Some other source of unwanted artifacts in nighttime photos is the same hot pixel issue I mentioned a moment ago. These are bright dots that may exist too large for the regular noise reduction algorithms to remove, and they are especially noticeable if you left Long Exposure Dissonance Reduction off in-camera. These dots are easy to remove, yet. After making my edits, I like to open my image with hot pixels in Photoshop, and then duplicate the groundwork layer to work non-destructively. On this new layer, I apply the Dust & Scratches filter at a radius of 1 or 2 pixels. This filter will remove almost all the hot pixels, while having lilliputian impact on other parts of the image. If yous notice that y'all are losing details, nonetheless, like stars in the sky, merely apply a mask to this superlative layer, or increment the threshold on the filter itself.
Decision
Whatever your option of subject, dark photography can be a wonderful fashion to go more familiar with your camera, stretch your artistic and artistic muscles, and refine your technical skills. Information technology doesn't require much equipment across a tripod, and you tin can observe subjects just most anywhere.
Like any new skill, learning nighttime photography can exist an iterative process. When you get your outset shots on your computer at home, don't be agape to look at them with a critical eye. Understanding the impact of exposure settings and technical elements can make for a better photo taking experience any time y'all apply your camera.
I hope this guide to night photography has inspired you to go out and explore some new subjects. If you have whatsoever questions, I'd be happy to answer them in the comments!
Belum ada Komentar untuk "What Creates a Challenge With Night Photography?"
Posting Komentar